
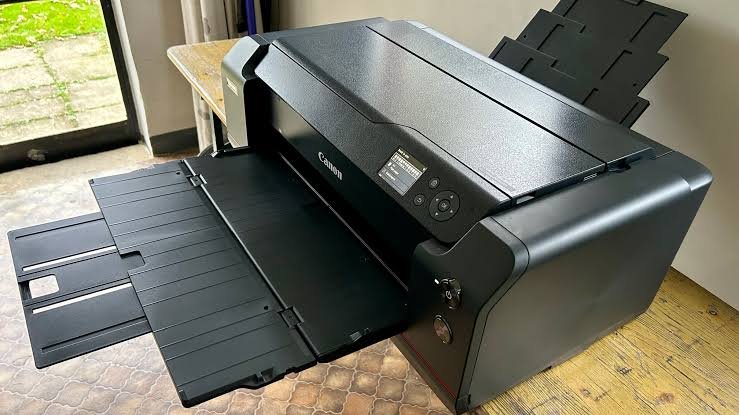
The Ultimate Canon imagePROGRAF PRO Maintenance Guide: LUCIA PRO Ink, Printhead Care, and Maintenance Cartridge Fixes

Introduction
The Canon imagePROGRAF PRO Series (ranging from desktop models like the PRO-300 and PRO-1000 to production-class wide-format printers like the PRO-2100, PRO-4100, and PRO-6100) sets the industry benchmark for gallery-grade fine art printing, commercial photography, and museum archiving. Built with Canon’s high-density PF-10 / PF-15 printhead technology and the advanced LUCIA PRO 12-color pigment ink system (including Chroma Optimizer), these machines produce unmatched color gamuts, deep black density (Dmax), and archival permanence.
However, handling heavy micro-pigment inks and high-precision thermal printhead nozzles requires strict operational discipline. Common issues such as color shifts, print banding, nozzle blockages, or sudden maintenance box warnings can stall high-stakes print runs.
In this technical guide, our engineering team at Enlite Consumables outlines step-by-step solutions for maintaining your Canon imagePROGRAF PRO printer, managing LUCIA PRO ink systems, and troubleshooting critical maintenance hardware.
1. How to Fix Banding and Prevent Clogged Nozzles on Canon imagePROGRAF PRO Printers
Canon’s LUCIA PRO inks utilize encapsulated pigment particles. While they offer superior lightfastness and scratch resistance, inactive periods or low-humidity studio environments can cause microscopic pigment sediment to dry on the printhead surface, leading to horizontal banding or missing color channels.
Step-by-Step Printhead Recovery Procedure:
- Print a Nozzle Check Pattern:Access the printer’s touchscreen or Status Monitor software, navigate to Maintenance, and execute a Nozzle Check. Examine all color lines—including Red, Blue, Photo Gray, and Chroma Optimizer—to pinpoint clogged channels.
- Targeted Nozzle Cleaning (Standard vs. Deep):If white streaks appear, run a Standard Cleaning for the specific nozzle group (Group 1 or Group 2).Pro-Tip: If streaks persist, perform a System Cleaning / Deep Cleaning. After cleaning, let the printer sit idle for 20 to 30 minutes. This allows heat to dissipate and micro-bubbles in the sub-tank lines to dissolve naturally.
- Check the Non-Firing Nozzle Inspection System:imagePROGRAF PRO printers feature automated sensors that detect non-firing nozzles and automatically route ink to backup nozzles. If the display panel alerts you of repeated nozzle compensation failures, a manual printhead wipe or deep fluid flush is required.
- Agitate Ink Tanks Regularly:For wide-format models that have been idle for over two weeks, remove the LUCIA PRO ink tanks and gently rock them side-to-side 5 to 6 times to re-suspend heavy pigment particles before initiating large print jobs.
2. Managing LUCIA PRO Pigment Ink Tanks & Chroma Optimizer (PFI Series)
The Canon PRO series uses high-capacity individual ink tanks (such as PFI-300, PFI-1000, PFI-1100, and PFI-1300). The system features a dedicated Chroma Optimizer (CO) tank that lays down a clear coat to eliminate bronzing, smooth surface gloss, and expand tonal depth on glossy and luster media.
Key Factors for High-Yield Pigment Ink Management:
- Sub-Tank System Advantage: Canon’s internal sub-tank architecture allows you to replace empty ink tanks during a print job without interrupting the operation or wasting media—a critical feature for wide-format production.
- Pigment Fluid Stability: High-quality compatible pigment inks must match OEM fluid viscosity, surface tension, and particle size. Inferior third-party inks can degrade the micro-heaters inside thermal printheads, causing premature thermal failure.
- Precision Smart Chips: PFI ink cartridges rely on encrypted IC chips to monitor real-time ink volume and communicate fluid pressure data to the mainboard. Certified replacement cartridges must utilize updated microchips to prevent firmware rejection errors.
Profit Strategy: Print studios, framing shops, and commercial photo labs can reduce Cost-Per-Print significantly by integrating certified, archival-grade compatible pigment inks that match LUCIA PRO color density and longevity ratings.
3. Replacing the Maintenance Cartridge (MC-30 / MC-31 / MC-16)
Unlike entry-level consumer units, the Canon imagePROGRAF PRO line utilizes a user-replaceable waste ink container, commonly known as the Maintenance Cartridge (e.g., MC-30, MC-31, MC-16).
How the Waste Ink System Functions:
During automatic head purges, borderless printing overspray, and system initializations, spent pigment ink is pumped into the maintenance cartridge located at the base or side of the printer. An integrated sensor chip tracks fluid absorption and alerts you when the absorption capacity reaches capacity limits.
Step-by-Step Replacement Guide:
- Monitor Capacity Gauge: When the control panel indicates that the maintenance cartridge is 80% full, prepare a fresh replacement module immediately to avoid unexpected halts during big print runs.
- Remove & Insert Module: Open the maintenance hatch, release the locking lever, pull out the saturated module, and slide the new maintenance cartridge firmly into the slot until it clicks into place.
- Automatic System Reset: Once installed, the printer reads the fresh chip, resets the internal capacity counter to 100%, and resumes operation automatically without requiring external software tools.
Keeping spare maintenance cartridges on hand is essential for commercial photo labs to maintain zero operational downtime.
Partner with Enlite for Professional Printing Supplies
At Enlite Consumables, we specialize in manufacturing and supplying premium, OEM-equivalent printing supplies for global distributors, office equipment dealers, and professional print workshops. From compatible pigment inks and toner cartridges to drum units, fusers, and maintenance components, our products are engineered to OEM-level standards to ensure maximum business profitability.