
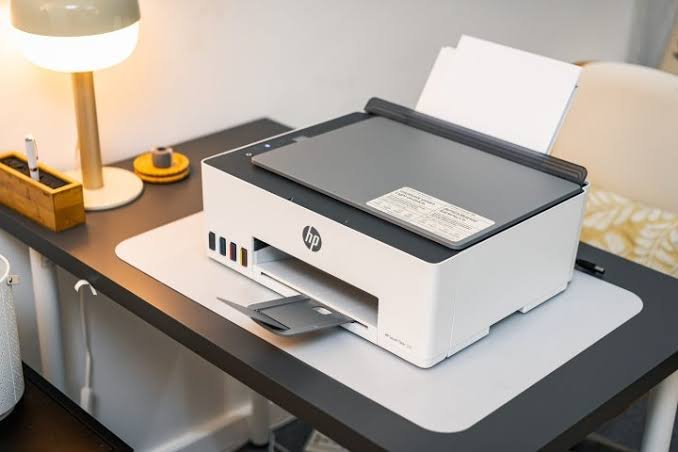
HP Smart Tank 580 Maintenance & Troubleshooting Guide: Ink Refills, Printhead Care, and Paper Jam Fixes

Introduction
The HP Smart Tank 580 is a leading wireless all-in-one printer designed for home offices, educational institutions, and small businesses requiring high-volume, low-cost daily printing. Equipped with HP’s thermal inkjet technology, integrated transparent ink tanks, and high-yield HP 32 Black (GT53) and HP 31 Cyan/Magenta/Yellow ink bottles, the Smart Tank 580 delivers thousands of crisp pages at an ultra-low Cost-Per-Page (CPP).
Despite its user-friendly Smart-Guided buttons and automatic low-ink sensors, maintaining optical print quality requires routine care. Common challenges like faded text, color banding, printhead alignment errors, or paper feed jams can interrupt your daily operations if not addressed correctly.
In this technical guide, our engineering team at Enlite Consumables provides step-by-step solutions for maintaining your HP Smart Tank 580, selecting the right refill ink, and troubleshooting key hardware components.
1. How to Fix Faint Text, Color Streaks, and Clogged Printheads on the HP 580
When your HP Smart Tank 580 sits idle or experiences heavy print cycles, air bubbles or dried ink can gather inside the ink delivery tubes or on the printhead nozzle plate. This often results in horizontal white lines, incorrect color reproduction, or completely blank output.
Step-by-Step Printhead Recovery Procedure:
- Print a Print Quality Diagnostic Page:Press the Information button (i) and Resume button together on the control panel (or access via the HP Smart App) to print a diagnostic report. Examine the color blocks (Black, Cyan, Magenta, Yellow) to pinpoint the affected channel.
- Automated Printhead Cleaning Cycle:Open the HP Smart App or printer driver software on your computer, navigate to Tools/Maintenance, and execute a Clean Printhead command.Pro-Tip: Allow the printer to rest for 10 to 15 minutes between cleaning cycles. This dwell period allows tiny air pockets within the ink feed tubes to dissipate naturally.
- Aligning the Printhead Assembly:If print text appears blurry or misaligned, run a Printhead Alignment. Scan the printed alignment sheet on the scanner glass as guided by the animated display to recalibrate the optical sensors.
- Preventative Usage Habits:Thermal printheads rely on liquid ink for cooling during operation. Avoid running your printer when ink levels fall below the minimum fill line on the front tank windows to prevent thermal damage to the printhead micro-resistors.
2. Refill Ink Selection: HP 32 Black & HP 31 Color Bottles (Original vs. Premium Compatible)
The HP Smart Tank 580 utilizes spill-free, auto-resealable ink bottles: HP 32 (GT53 XL) Black (Pigment-based) and HP 31 Cyan, Magenta, and Yellow (Dye-based).
Key Standards for High-Quality Refill Inks:
- Pigment vs. Dye Hybrid Balance: Black ink must utilize refined pigment formulations to ensure waterproof, highlighter-resistant text on plain paper. Color channels require high-purity dye formulations to prevent nozzle clogging and yield vivid photo saturation.
- Spill-Free Keyed Bottle Caps: Quality refill bottles feature custom-engineered auto-stop caps that fit securely onto the HP 580 tank valves, ensuring zero mess, leaks, or cross-color contamination during refilling.
- Micro-Filtration Standard: Fluid purity is essential for thermal inkjet nozzles. Certified compatible inks undergo strict multi-tier filtration to prevent microscopic debris from building up inside the printhead heaters.
Profit Advantage: Stationers, commercial print shops, and office suppliers can lower fluid expenditure by up to 60% without risking hardware reliability by utilizing certified, high-yield compatible bottle ink.
3. Printhead Replacement & Hardware Error Handling (Printhead Warning Icons)
Unlike traditional cartridge printers, the HP Smart Tank 580 uses user-replaceable Black and Color Printhead Modules. If the control panel displays a blinking Printhead Light alongside a “Black” or “Color” icon, the printer detects a hardware handshake or electrical connection fault.
Steps to Inspect or Replace HP Smart Tank Printheads:
- Accessing the Carriage: With the printer powered on, open the front door and wait for the printhead carriage to move to the center.
- Inspect & Clean Contact Pads: Press the blue carriage latch down to release the printhead. Carefully remove the module and inspect the gold-plated electrical contacts. Wipe away any dust or stray ink using a lint-free cloth lightly dampened with distilled water.
- Installing New Printhead Modules: Unpack the fresh replacement printhead, completely remove the orange protective caps and sealing tape, and slide the module into its color-coded slot until it latches firmly.
- Close Blue Latch Housing: Ensure the blue carriage latch is locked down securely. Note: Never open the blue latch after initial setup unless replacing the printheads, as this can break the vacuum seal in the ink tubes.
Partner with Enlite for Global Printing Supplies
At Enlite Consumables, we specialize in manufacturing and supplying premium, OEM-equivalent printing supplies for global distributors, office equipment dealers, and repair centers. From compatible bottle inks and toner cartridges to drum units and replacement components, our factory-direct solutions are built to keep your business competitive and profitable.